Showing posts with label photography. Show all posts

Saturday, March 5, 2016

Monoammonium Phosphate Crystals from a Kit

I've been eyeing crystal growing kits since I was a kid, so I finally ordered myself one. The one I got is the 4M Crystal Growing Experimental Kit which I ordered on Amazon. Monoammonium phosphate is the chemical used, and the kit came with enough supplies to grow 7 different crystals of various sizes. I followed the instructions from the kit, which essentially involved dissolving the monoammonium phosphate in hot water, letting it cool, then adding the seeding mixture on the surface and leaving it undisturbed for several days. I found a candy thermometer, which was super useful for getting the exact temperatures recommended in the instructions for each step.


Day 1: The set up was completed at 2:00pm on 2/15/16. The kit came with three different seeding colors (blue, white, and red). I mixed the colors such that the small containers would have blue, red, white and purple, the medium ones have light blue and pink, and the large one has light purple. After only a couple hours, the light blue crystal were already forming shards which extended about three quarters of the way up the container. The purple and light purple solutions were too dark to see into, even after shining a flashlight into them. Granted, my little flashlight isn't the brightest.


After 12 hours: The light blue and pink crystals were both of significant size already. I could tell that the pink crystal had a different, more rounded shape than the others. The white and blue crystals were both forming tall skinny shards, the tips of which were just barely sticking up past the surface of the solution. I was surprised at how quickly these particular samples grew.


Day 2: The small red sample was forming very small crystals at the bottom of the container. The blue and white crystals had a couple shards each which were forming past the surface of the solution in really interesting shapes. I began to wonder if I should take them out at that point, since I wanted them to still fit in the provided plastic display containers... but these crystals were so thin that I was worried they would break. I decided to wait one more day.


Day 3: I removed the blue and white crystals to keep them from getting too tall to fit in their cases. I also removed the light blue, medium crystal. Although it was growing quite well, it too had the tips of some of its shards sticking out above the surface. Unlike the smaller samples, however, the tips just seemed to get cut off rather than developing interesting formations above the surface. The medium sample was pretty solid, but the smaller samples were super delicate, and I lost a few small shards during handling.

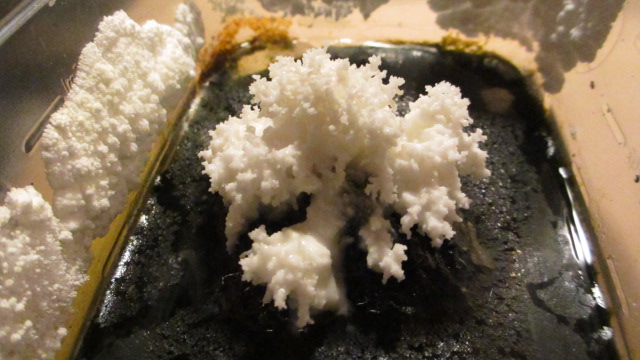
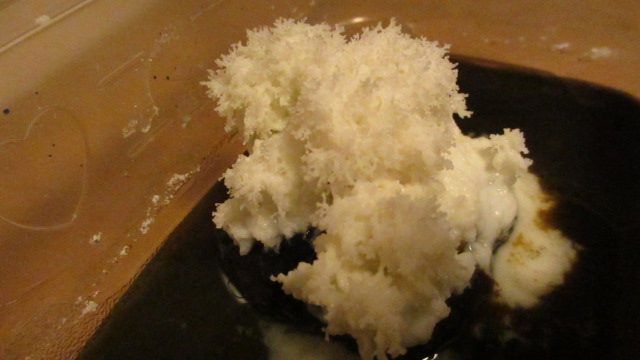
medium light blue crystal
it probably could have grown bigger if it weren't for the container wall


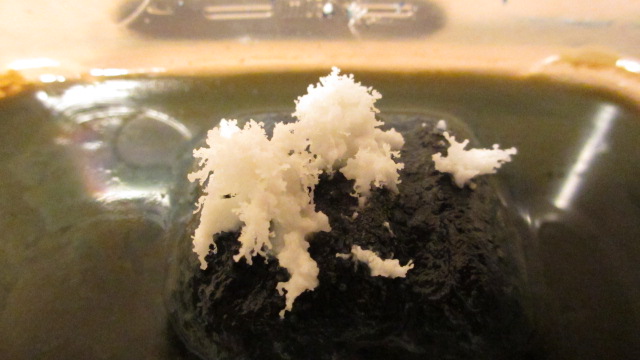
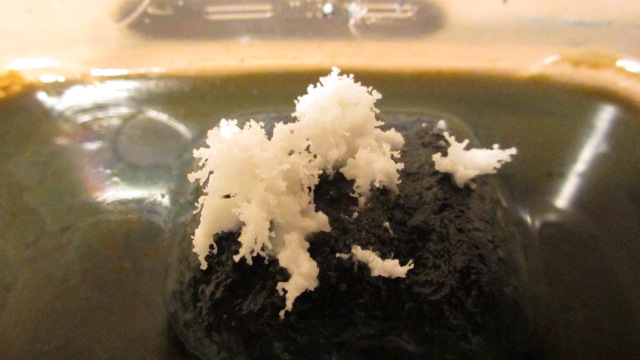
small blue crystal

small white crystal
piece that broke off
separate white crystal formation

After taking pictures and painstakingly putting them back in their cases, tragedy struck. I dropped the small blue crystal, which fell out of its case and shattered into a dozen pieces. Horrified, the first thought passing through my head was, "but I haven't even named it yet..." Odd because I wasn't actually planning on naming them, but Wilson would have been a good choice. That way when I cried out "Nooooo!" I could have also fallen to my knees and yelled, "WILSON!!!" On the plus side, Wilson's demise doubled my collection of monoammonium phosphate seed crystals, which I'm storing in a ziplock bag for future experiments.
this is all that was left of Wilson...


Day 5: I removed the medium sized "pink" crystal. This one actually came out more red than pink and didn't have the layer of clear crystal the way the light blue one did. I'm pretty happy with the formation however. It was even easier to handle than the other medium sized crystal.
medium pink crystal


Day 8: I still couldn't see into the purple solutions, although quite a bit of solution had evaporated off, especially in the large container. I didn't see crystals poking out of the solutions, so I figured they could use more time.
I could just barely see some crystals forming on the bottom of the small red container, and a couple shards were starting to stick out of the solution and hit the walls of the container. There were also tons of crystals forming on the sides of the container, so I decided to take this one out since I didn't want the crystals on the sides to disrupt further formation. In hindsight I probably could have let the main crystal grow a little bigger and then just knocked off any excess crystal formations. There were two slightly smaller crystal formations in the container as well.
small red crystal
close-up


Day 12: I removed the small purple crystals. There were four separate pieces in the container, which turned out more of a pinkish color with clear sections.
small "purple" crystal


Day 15: The solution in the large container (which was supposed to be light purple) had more than half evaporated by this point, and there were three or four places where the crystal was starting to poke above the surface. After removing the crystal, I could see that it looks mostly red overall, but in certain lighting one can see a purple color towards the base of the crystal. This is definitely my favourite crystal of the seven.
large "light" purple crystal
bottom of the crystal


Conclusion: Some crystals definitely grew better than others. In most cases, allowing the crystal to grow above the solution seems to result in the exposed surfaces getting "worn away". I suspect this has something to do with the moisture in the air slowly dissolving the crystals, as the kit instructions recommend keeping the crystals in their display cases after they're complete in order to prevent this. The exceptions to this were the white and blue crystals, which developed formations above the surface of the water; since they grew fast and were only left exposed to the air for a day or two, there wasn't any noticeable "erosion".

Mixing colors didn't yield exact results. For example, the "pink" turned out just looking red, the "light blue" looked about the same as the blue, and the purple looked more pink. Nevertheless, mixing colors did result in a little more variety and had some interesting effects (even if they weren't the expected ones).
the seven crystals in their display cases

I kept a zip lock bag of "seed crystals" that I plan to use in future experiments. Now that I've had the kit experience, I may, at some point, purchase monoammonium phosphate directly and do some research on how to grow these types of crystals from scratch.
monoammonium phosphate seed crystals
shard that broke off from the large crystal

Monday, February 22, 2016

First Salt Garden Experiment

When looking up easy to grow crystals, I found a great source of information on salt gardens (and many other awesome projects!) at waynesthisandthat.com, site owner Wayne Schmidt. I used the recipe which can be found here.

I was intrigued by the different variables that could affect the salt crystal growth, some of which were already described on the site. I decided to explore the effects of varying the amount of liquid bluing and ammonia. The amount of bluing would be either 4, 8, or 12 tbsp and the amount of ammonia would be either 4 tbsp, 2 tbsp, or none and then 8 tbsp added to the solution on the third day. Testing each combination gave me 9 different samples, which I labelled samples A through I. These are listed below under "sample amounts".

Note: This experiment lasted about two weeks. During that time, I measured humidities between 41 and 52% and temperatures between 66 and 77 degrees Fahrenheit in my closet where the samples were set.


Ingredients and materials:
-4 tbsp tap water
-4 tbsp table salt
-liquid bluing (see sample amounts)
-ammonia (see sample amounts)
-charcoal pieces
-vaseline
-plastic containers
-tbsp measure
-gloves
-goggles


Sample Amounts:
Sample A
4 tbsp liquid bluing
4 tbsp ammonia

Sample B
8 tbsp liquid bluing
4 tbsp ammonia

 Sample C
12 tbsp liquid bluing
4 tbsp ammonia

Sample D
4 tbsp liquid bluing
2 tbsp ammonia

Sample E
8 tbsp liquid bluing
2 tbsp ammonia

Sample F
12 tbsp liquid bluing
2 tbsp ammonia

Sample G
4 tbsp liquid bluing
no ammonia then 8tbsp on 3rd day

Sample H
8 tbsp liquid bluing
no ammonia then 8tbsp on 3rd day

Sample I
12 tbsp liquid bluing
no ammonia then 8tbsp on 3rd day


Documentation:
Recipes completed at 4:00pm on 2/9/16.
the setup


After 2 hours: I sprinkled four pinches of salt on top of each of the charcoal pieces. (At this point, no visible crystals have started forming yet.) Sample A's solution has turned a dark, brownish red color, but all the other samples remain a dark blue.


After 4 hours (2 hours after additional salt was added): Crystal can be seen growing on top of all of the charcoal briquettes. Upon closer inspection, the brownish red solution of sample A is growing plenty of salt underneath the surface. Sample D's solution is turning a dark yellow, and sample B has patches of yellow as well. The liquid bluing appears to have settled to the bottom of each container. With the exception of samples G, H, and I, all the samples have at least some crystals forming on the edges of the briquettes and the bottom of the container.


After 48 hours: Most the samples look roughly the same as they did when I last checked. However, sample F has begun to clearly grow crystals upwards from the coal briquette.


After 72 hours (3 days):
In addition to sample F, samples A and D have also begun to acquire salt crystal growth. Sample A's growth has overtaken sample F, so far doing the best of the three.


After 96 hours (4 days):
Since it took a while for the solutions to evaporate, I waited until the 4th day (instead of the 3rd) to add more solution. Since none of the samples needed much additional liquid, I made a half recipe for each sample, except for samples F, H and I, for which I made quarter recipes.

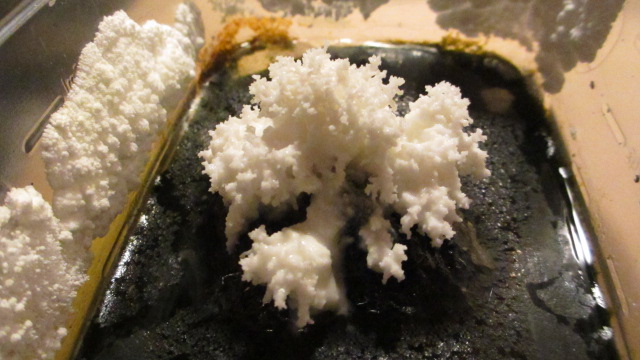
Pictures were taken before adding the additional solution. At this point, all of samples A through F have vertical crystal growth except for sample C. Although samples G, H and I are not yet growing crystals in the vertical direction (probably since there is no ammonia in the solutions yet), they have changed somewhat since the first day; salt is forming over the surface of the briquettes, and has a sort of "crackle" appearance. There are also deposits of salt forming on the upper sides of the briquettes.
Dry "crackle" appearance on sample H after 96 hours


After 108 hours (4.5 days):
12 hours after adding the additional solution, noticeable salt crystal growth can be seen since the previous set of pictures. At this point, all 9 samples have some degree of vertical crystal growth. Samples G, H, and I have more feathery looking growths at this point, which have sprung up quite quickly. The solutions have a red tinge under the surface, much like sample A did at the very beginning of the experiment. These effects are likely due to the ammonia being added for the first time for these three samples, and to there being more of it than in any of the other samples.


Day 11: Samples A, G, and H appear to be doing the best at this point. Even the samples which have quite a bit of crystal growth, however, still have "soggy" patches. Perhaps the humidity is too high? Or the crystals were disturbed at some point and collapsed? I may experiment with a fan set to low in the future, as suggested in the original recipe. (I didn't want to use a fan for this first experiment as I didn't want it to blow across some samples more than others, skewing the results.) In contrast, samples B and C are lagging far behind the other samples, as they still only have a tiny dot of growth.


Day 13: Samples B and C have finally begun to develop a noticeable amount of salt crystal growth. Samples H and I have salt crystals growing on the sides of the container. These may soon grow right over the top. I only put vaseline on the sides about an inch above the solution, and the crystals seemed to have skipped right over this section and only grown above it. Interestingly, while all the samples have slightly soggy crystals forming on the briquettes, the crystals forming on the sides of H and I's containers are not soggy at all. They're also have a more rounded appearance rather than the feathery look of the crystals growing on the briquettes.

Overall, samples A, G, H, and I seem to have formed the largest growths, with sample A staying in the lead most steadily throughout the experiment. This suggests that the ratio suggested in the original recipe does quite well (sample A) and that adding the ammonia in after a few days may also be worth trying out (samples G, H, and I). Also worth noting; having higher ratios of bluing to ammonia seems to produce poorer results (samples B and C did worse when compared to sample A, and samples E and F did worse when compared to sample D).


Each samples on the 13th day:
Sample A

Sample B

Sample C

Sample D

Sample E

Sample F

Sample G

Sample H

Sample I


While I took pictures of every sample at various intervals (4, 72, 96, 108 hours and days 11 and 13), it would take up too much space to include all of them here. So here is an example of the salt crystal growth for just sample A:
After 4 hours

After 4 hours - closeup

After 72 hours

After 96 hours

After 108 hours

Day 11

Day 13

Tuesday, February 16, 2016

Epsom Salt Crystals - Evaporation Method

Several sites suggest using a sponge or other porous material to give crystals something to grow on. Also, I noticed that while most recipes suggest a 1:1 ratio of water to epsom salts, some suggest a 2:1 ratio, so I decided to try this out and see if it worked.


Ingredients and materials:
1/2 cup water
1/4 cup epsom salts
sponge
container
food coloring (optional)


Recipe:
1) Heat the water (until it's not quite boiling), then mix in the epsom salts until dissolved. Optional: mix in food coloring.

2) Pour the mixture over a sponge in a small container.

3) Place in a warm, dry location and wait several days.


Documentation:
I made four bowls for the evaporation method, one without food coloring, and one with blue, red, and green food coloring respectively. I put three drops of each color directly onto each sponge and another drop mixed in with the water. The recipe was completed at 9:00pm on 2/7/16.

Note: I got a humidity and temperature monitor which collects the high and low temperature and humidity readings over the course of 36 hours. My closet, where I kept the samples, had a temperature of between 72 and 77 degrees Fahrenheit, and a humidity level of between 41 and 50%.


the setup

On day 4: Three of the bowls appear the same (except with perhaps a little of the solution evaporated off), but the red sample has formed crystals across the entire surface of the solution.

red sample after 4 days

On day 6: The red sample did not change noticeably since day 4. I suspect this is because the crystals that formed over the surface trapped the liquid underneath without any exposure to air. This would mean it couldn't evaporate any further and thus no new crystals could form. The clear and blue samples were starting to resemble the red sample. However, there were pockets where the crystals had not completely covered the surface and epsom salt "needles" can be seen forming.

blue sample after 6 days
clear sample after 6 days

The green sample is the most interesting. The sponge appears to be serving its intended purpose; drawing the solution up through capillary action such that salt crystals form on the surface of the sponge. Less liquid remained in the container at this point, indicating that either more of it was held by the sponge or that it has evaporated off more quickly than the other samples. Again, epsom salt needles can be seen forming in the remaining liquid. They are more pronounced than the ones in the blue or clear samples.


green sample after 6 days
The likely reason that the green sample is having the desired results is that the container is shaped slightly differently. At the beginning of the experiment, the depth of the solution for the other samples was such that the sponges either floated in the liquid or were submerged beneath the surface of it. The green sample is the only one where the sponge sat on the bottom of the container with the liquid not quite covering the top. This would provide for an exposed surface for crystals to form on and allow evaporation to continue as more solution was drawn up through the sponge.


Day 8: Since the solution had almost completely evaporated off of the green sample, I decided to end the experiment at this point and examine the crystals.

blue sample after 8 days
red sample after 8 days
clear sample after 8 days
green sample after 8 days

Here's a close up of one of the surface crystals. It was extremely thin and delicate, and I wasn't able to save it:


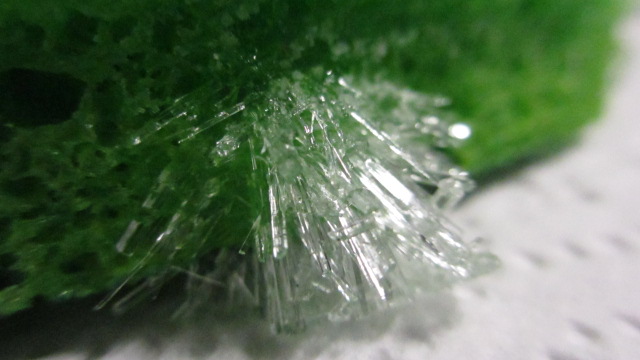
The crystals on top of the green sponge are quite small, but packed close together. They reminded me of some of the sugar crystals from the rock candy experiment:


In addition, spiky formations grew out of the sponge near the bottom:


There were also some really pretty crystal formations that I didn't see until I sifted them out with a fork.


This was the biggest one. It formed on the bottom of one of the rounded containers, which seemed to help shape its formation:


Here's one of the larger epsom salt "needles":


Some more formations:


In addition, there were a bunch of smaller, separate epsom salt needles which formed under at the bottom of each container. I sifted them out with a fork, dried them and put them in a pile. A pink tint can be seen on some of them from the red food coloring:


The food coloring idea did not turn out too well; I would need to add way more than I did for the crystals to be colored. As it is, there is only a very slight red tint on some of the epsom salt needles and a faint blue tint on the largest crystal formation (which isn't noticeable in the pictures).

This time I did manage to apply two coats of clear nail polish on several of the crystals to help preserve them (many sites say they will turn white over time otherwise). Letting them sit for a few hours on a paper towel seemed to help their structural integrity such that they could be handled long enough to apply the nail polish. One still needs to be quite gentle, however. I did lose a few spines here and there during the process.

I put the pile of epsom salt needles in a small zip lock bag for safe keeping. I'm planning on using them for a future experiment, since "seed crystals" can help speed up the crystal growing process and provide a site for the new crystals to begin forming.